Walljuke MP3
Bringing classic jukebox wallboxes back to life

The WallJuke MP3 adaptor is an easy-to-install MP3 player that will turn your silver age jukebox wallbox into an MP3 player. Simply install the unit, set it up for your wallbox using the display and plug it into a suitable audio playback device.
Now all your selections can be A sides. Simply load up a Micro SD card with your favourite music tracks, select them using your wallbox and it’s party time.
- Enjoy high quality stereo sound output via the standard 3.5mm stereo jack provided
- The Attract Mode option plays a random track after ten minutes
- The Random Play option provides continuous random music selections
Which wallboxes can I use the Walljuke MP3 with?
The Walljuke MP3 adaptor currently supports the following Seeburg and AMi wallboxes:
- Seeburg 3W1
- Seeburg 3WA (200)
- Seeburg SC consolette (160)
- AMi W40
- AMi 80
- AMi 120
- AMi WQ200
- Wurlitzer 5250 (200)
- Rockola 507 (160)
- Rockola 1594 (100)
Support for more wallboxes is in progress.
Please enquire if you don’t see yours listed.
Power requirements and wallbox connections
The Walljuke MP3 adaptor requires a regulated 9–12V, 500mA DC power supply. This should be connected to the two terminals labelled +12V and GND. It is also possible to convert the correct voltage from the 25v AC to power the Walljuke MP3 adaptor.
There is a protection diode installed on the Walljuke MP3 adaptor to prevent damage due to incorrect DC polarity, but you should ensure your DC input voltage is correct before connecting it to the Walljuke MP3 adaptor.
The Walljuke MP3 should be powered in the conventional way with 25V AC. This will provide the 25V AC selection signal pulses to the Walljuke MP3 adaptor. The adaptor should be connected to the two wallbox terminals labelled signal and 25v AC.
The signal input is completely opto-isolated from the Walljuke MP3’s electronics,
to prevent damage resulting from incorrect connection to a wallbox.

 Adding MP3 audio files to the Walljuke MP3
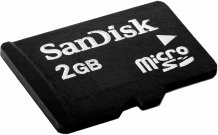
MP3 files are stored on a micro SD card, fitted into the right hand side of the Walljuke MP3 unit. The microSD card should be formatted as FAT32. The cheap smaller cards of around 2GB are ideal and already FAT formatted.
The files need to be numbered from 001xxx.mp3 to 200xxx.mp3, for as many selections as your wallbox is capable of selecting.
Using a Seeburg 3WA wallbox, the numbering will run from A1 = 001xxx.mp3 through to V10 = 200xxx.mp3.
Using an AMi 200, the selections will run predictably from 001xxx.mp3 up to number 200, which will be 200xxx.mp3.
Note:
It is important that the files have 3 numerical digits before the remainder of the name, with leading zeros where necessary, ie. 001xxx.mp3, 010xxx.mp3, 100xxx.mp3 up to 200xxx.mp3, otherwise the Walljuke MP3 will not understand what to play.
Music files must be placed within a folder named 01 at the root level of the SD card and not nested inside a folder somewhere where the Walljuke MP3 cannot find it.
The Walljuke MP3 display
 The display should be connected to the header marked VCC GND SCL SDA, which is mounted above the processor module, top left. Indication will be provided to show which pin should be positioned toward the edge of board. No damage will result if the connector is inadvertently connected the wrong way round, however the display will not function.
The display is small enough to be fitted in most wallboxes, with a little ingenuity.
Audio line out
 The sound output is via a standard 3.5 min stereo jack on the MP3 player module. This can be plugged into any suitable sound amplifying device or sound system.
Normal operation of the Walljuke MP3
 Assuming the necessary connections have been made and a micro SD card with correctly named tracks has been inserted, powering up the Walljuke MP3 should show static lights on both the processor board on the left and the MP3 player on the right.
A startup screen will show briefly, before showing the currently selected wallbox.


If this is not correct, then pressing the cancel switch while this screen is displayed will allow you to enter the setup menu which will be described below, but for now assume that the wallbox setting is correct. After a few seconds the wallbox will be available for selections and will display ‘Make Selection’. If a valid selection is recognised, the selected track will be displayed and when it starts will change to say ‘Now playing’.


If another selection was already playing when the new selection was made, the display will revert to that selection once any new selection has been verified.
 Changing settings with the CANCEL button
This button is located centrally on the circuit board and serves two functions, Its primary function is to cancel the currently playing song and allow to unit to move on to the next, if there is one. There is a two pin 0.1″ header directly above the cancel button, should you wish to arrange an external cancel switch.
The secondary function of this button is used within the setup menu which follows.
Editing with the setup menu
A menu is provided which allows you to configure the following:
- Your wallbox type
- Whether attract mode is in operation
- Whether random play can be made active by pressing A1/01
- Whether to use coinage or free play
Attract mode will play a random track after a period of ten minutes following the end of the last selection made. Once the first random song has finished, there will be a further delay of five minutes after which another random song will be played.
Should any selection be made while the unit is playing random selections, then the random song will be cancelled immediately and the news selection will start.
If selected, random play will be queued if A1/01 is selected. Once A1/01 is reached random tracks will play continuously until a selection is made manually, after which normal operation will resume.

 Entering the edit menu
The menu is accessed by powering the Walljuke MP3 back on or resetting the microprocessor using the small button directly below the connector for the display module.
After the startup screen which will display for a few seconds a second screen showing the currently selected wallbox will be shown. Holding down the cancel button at this time will enter the setup menu.
 Set wallbox type
The current wallbox configuration is displayed. When this menu appears, release the cancel button.
Single click the cancel button to cycle through the options to the wallbox you require.
 Set random mode
A double click advances to the SET random MODE options and a single click cycles among the options.
The options are:
- Off – normal wallbox button selection only
- Attract Only
- Attract and random on A1/01
- Play on A1/01 – random play with no attract tracks played
 Set credit mode
A further double click advances to the SET CREDIT MODE option and a single click toggles this option between on and off.
Please note: the use of credit mode requires further modification to your wallbox. Please enquire.
Double click to again show the current configuration, if you are happy, hold down the cancel button until you see:

 Saving your settings
Reset the unit using the small button on the processor just below the display connector or reboot by removing the power.
Your settings will be saved for future use.
Connecting the Walljuke MP3 to your wallbox

Have a question? Please contact us
[contact-form-7 id=”2107″ title=”message_us”]